How to share a project
Think of a project like a folder that contains media in the form of a playlist. A project can contain audio and video files as well as documents and links to external websites.
Sharing QR codes
- First create a project or go to an existing project.
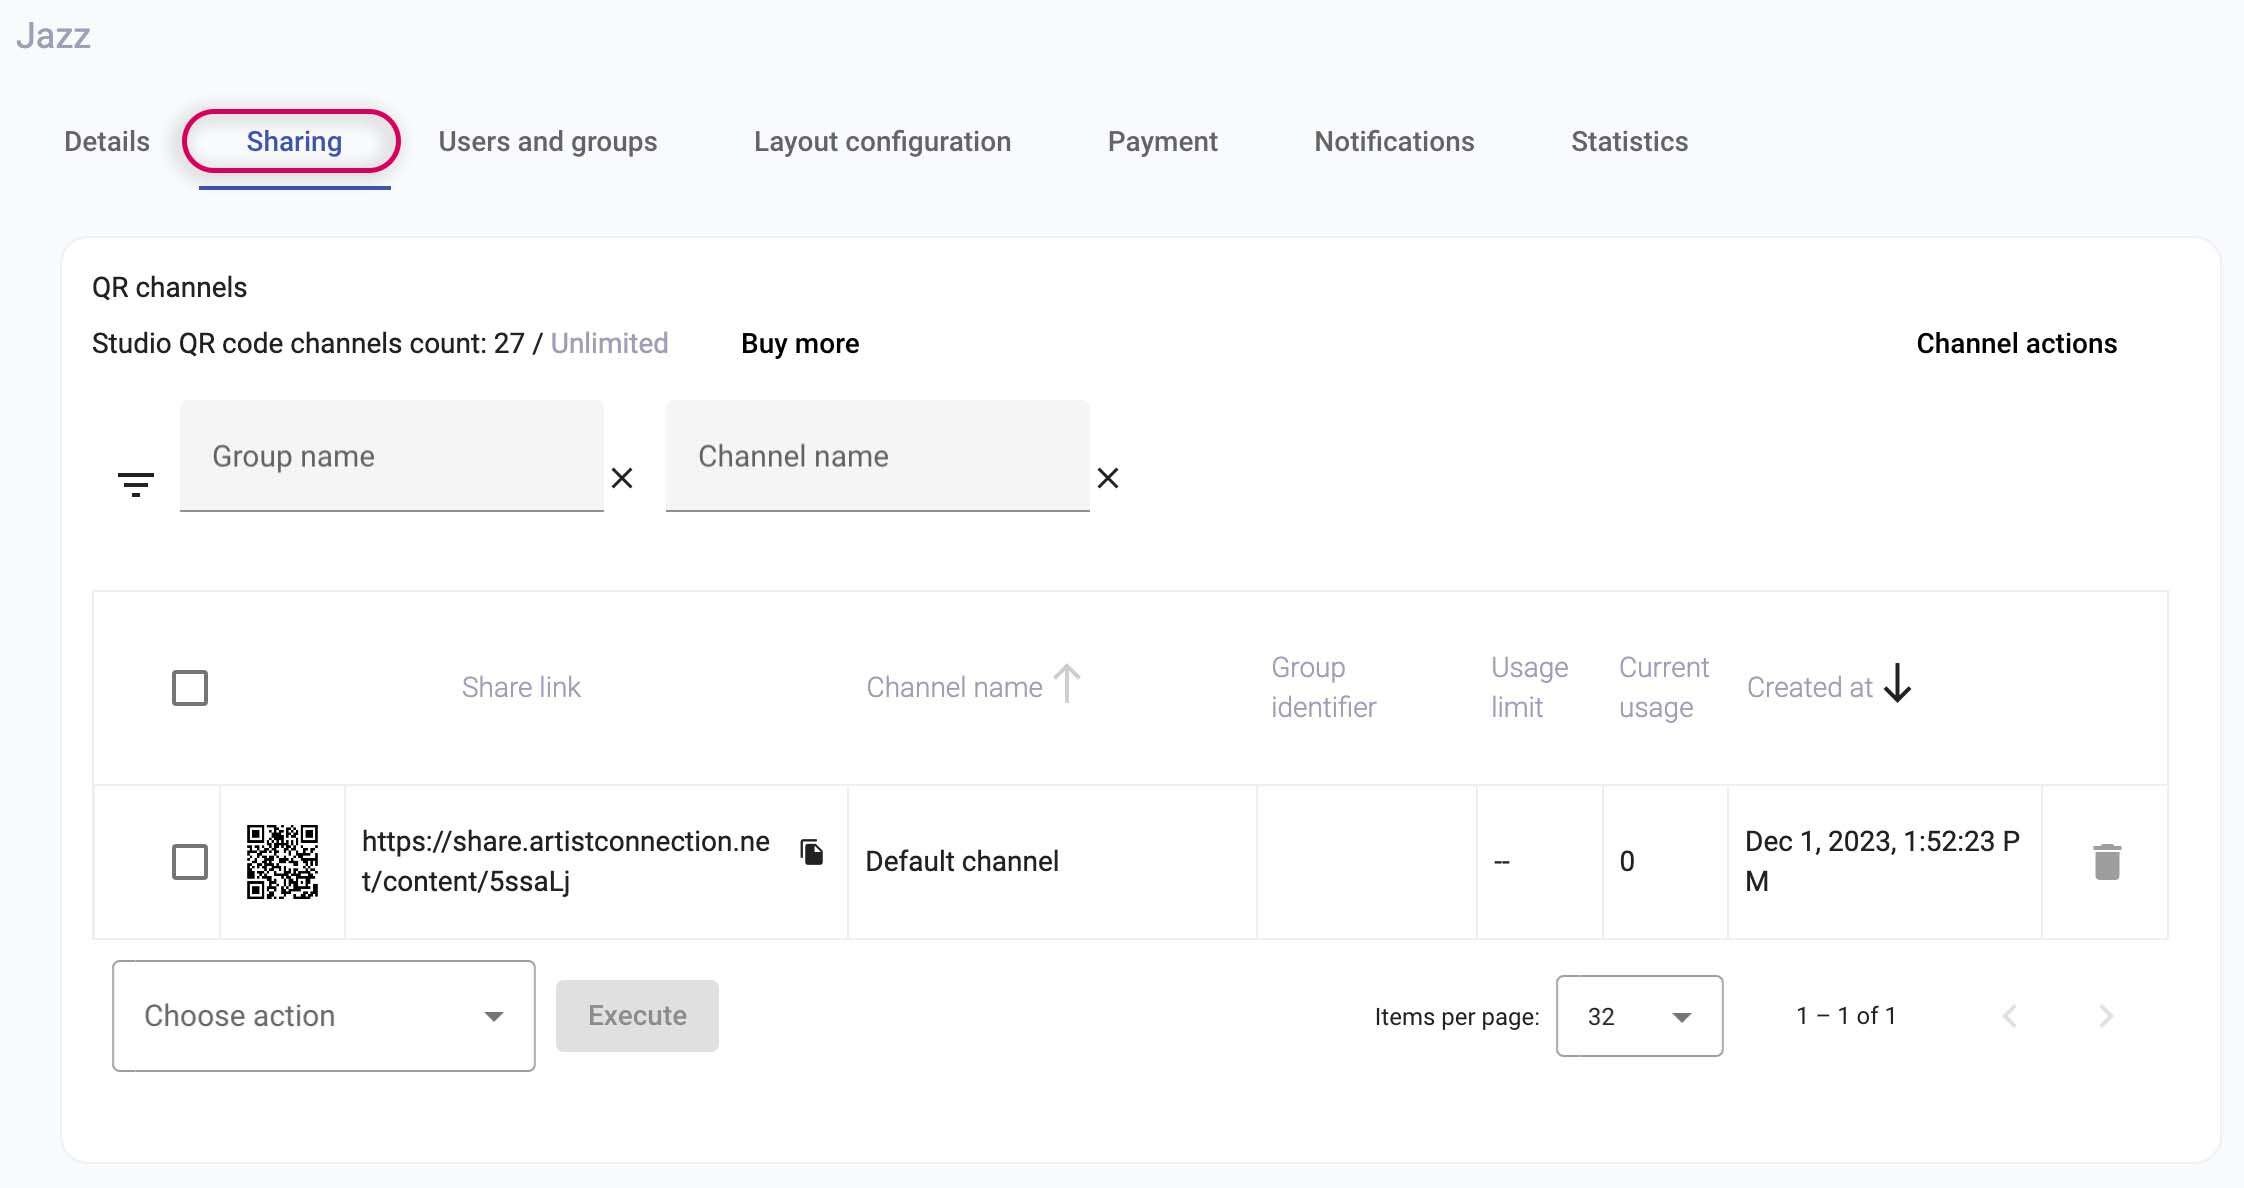
- Click the Sharing tab.

- Click Channel Actions. Here you can add new QR codes, both single and groups of QR codes. Learn more about channels and what each channel action does here.
- Create either a single or group of QR codes.
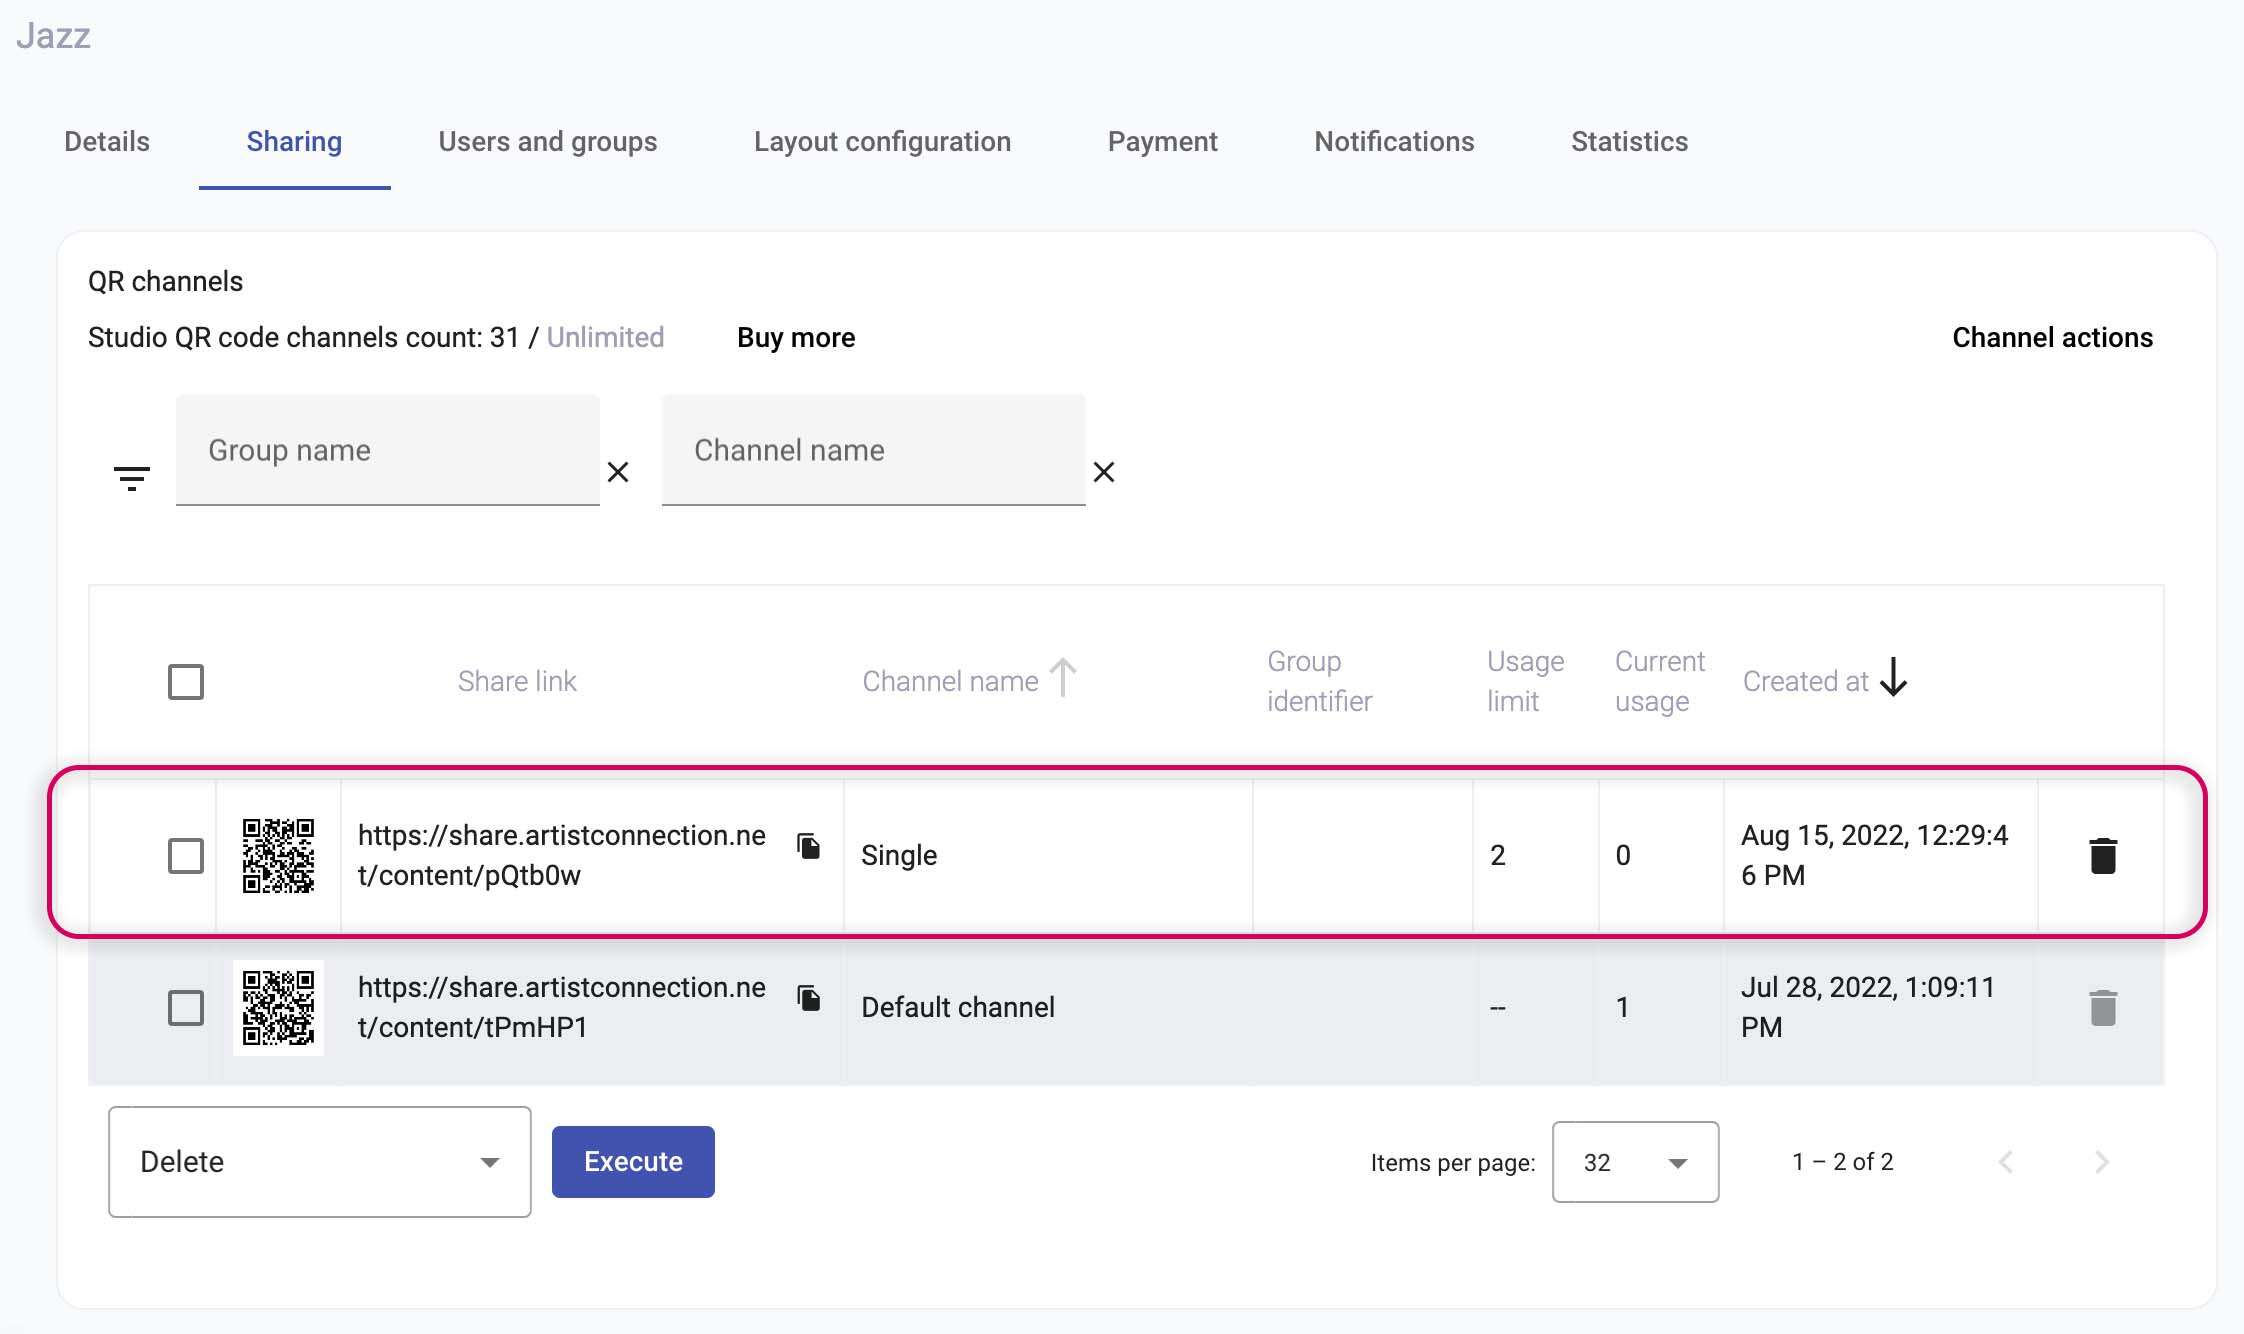
- After clicking save, your new QR code will appear under QR Channels. You can now copy the code and share as you’d like.

Sharing With Users and Groups
Once you have created your project, you’ll want to share it! Depending on how and who you want to share your content, you might want to add users individually or with groups.
Adding Users
You can only add users and groups once you create a project, so make sure to click Create Project first.
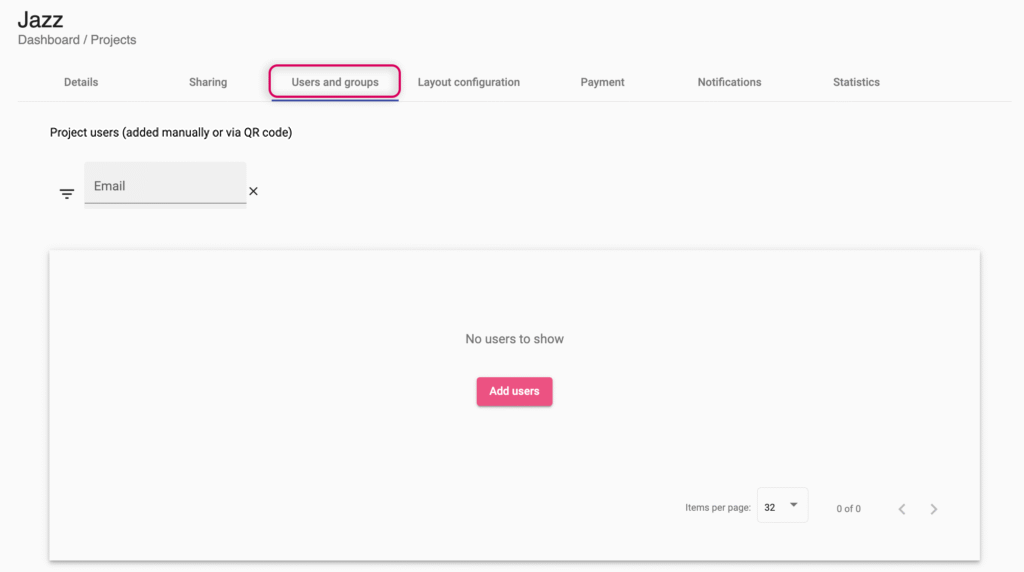
- Click the User and Groups tab.

- Click Add Users.
- Enter in the emails of all the users you would like to invite. Users must be invited to Artist Connection before adding them to content. Learn how to invite users here.
- Once all emails have been added, click Invite.
Adding Groups
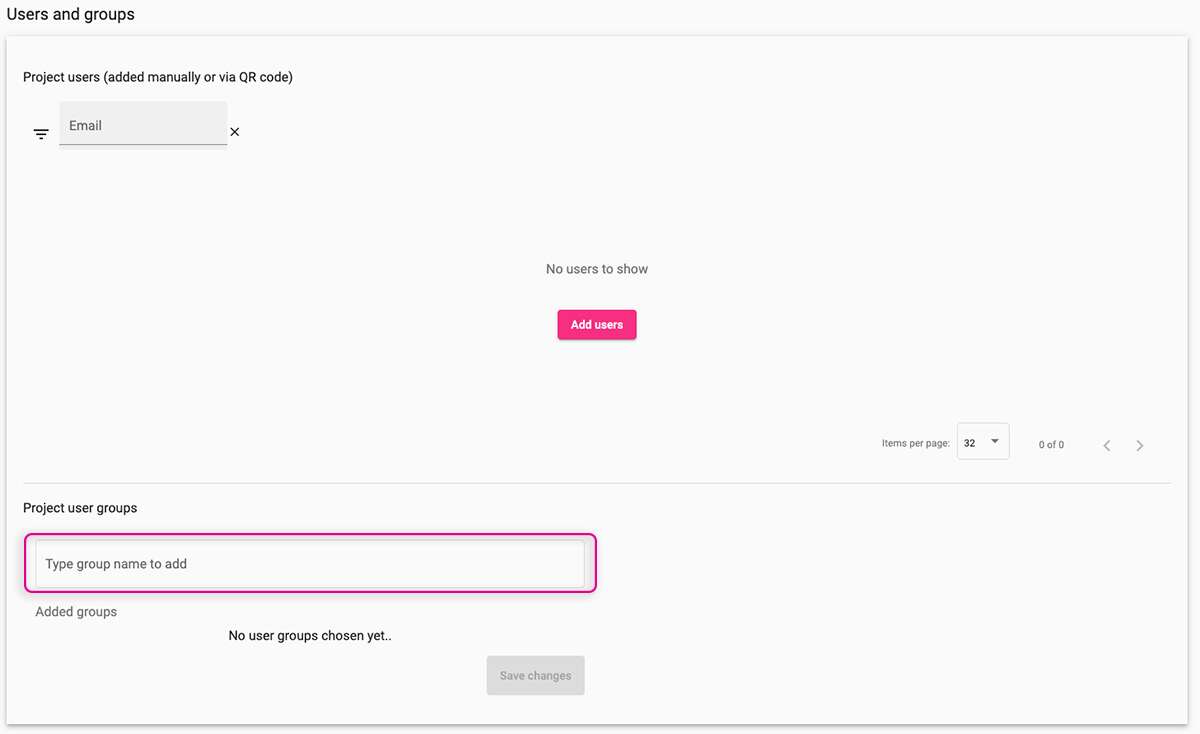
- In the User and Group tab, scroll to the bottom and find the Project User Group section. Type in a group name to add them to the project. This makes the project visible for this group in Artist Connection.

- Click the group you’d like to add to the project
- Click Save Changes.
