How to create a project
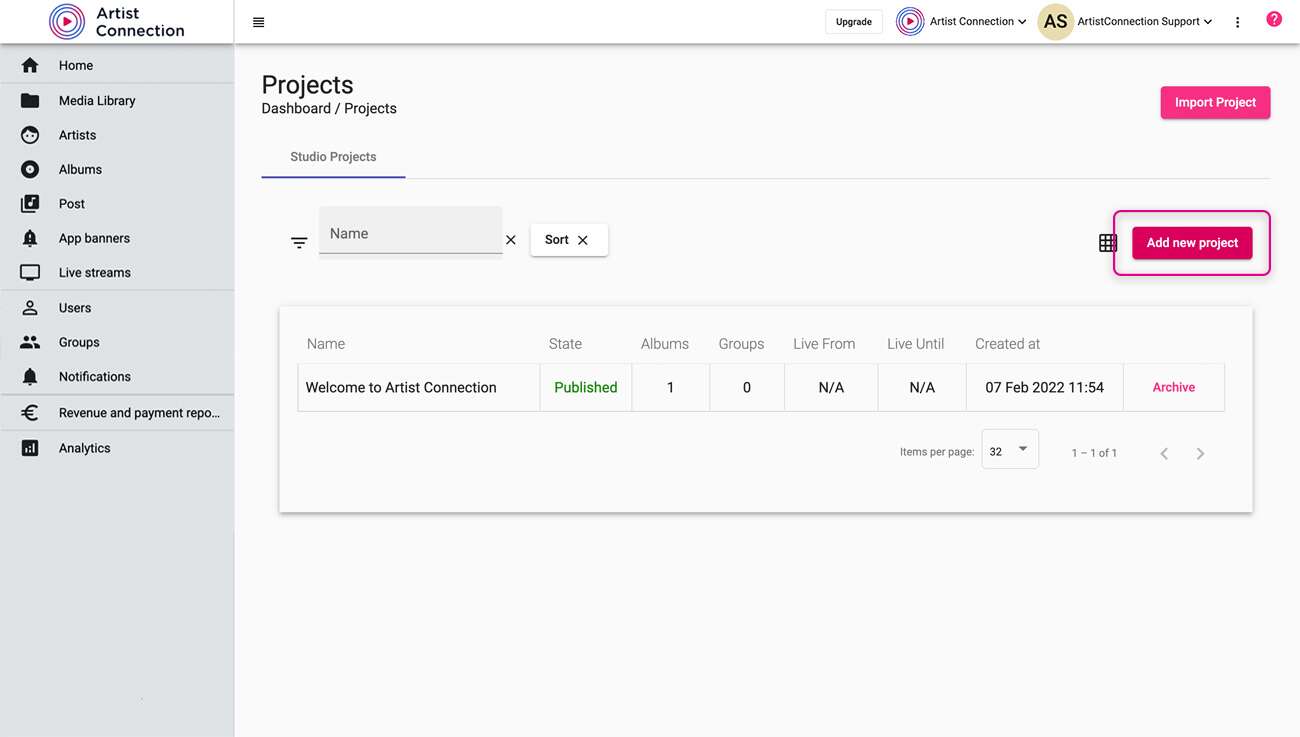
- Click Project on the left hand menu.
- Click the Add New Project button.

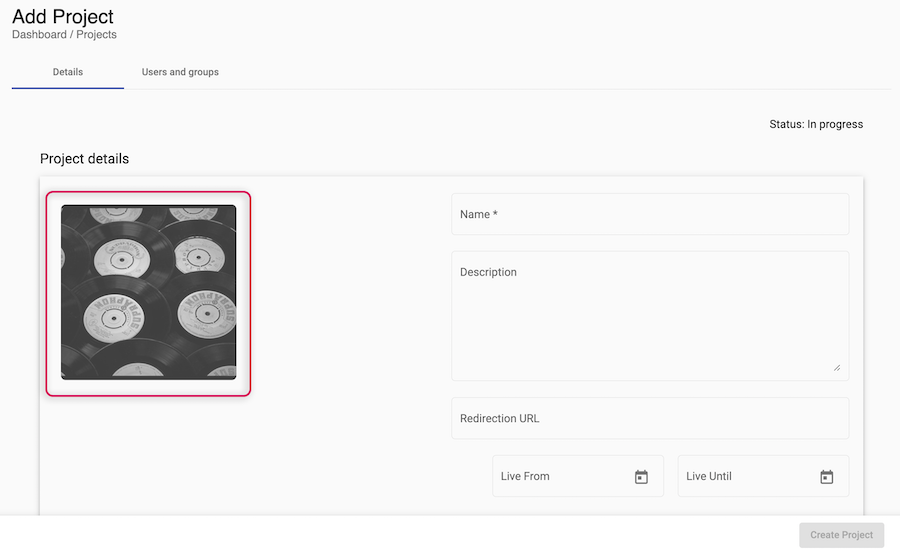
- Enter all of your project details.
- Add an image to your project:
- To use a file from your local machine, locate the file then drag and drop it on the default image in the portal.
- To use an image from your media library, click on the default image to open your media library. Locate the file you wish to use then drag and drop it to the default image.

- You can either continue on and add albums or click Create Project to save your progress.
Add Albums
- From a project, scroll down to the album section.
- Click Add Albums.
- Albums will open on the right side of the screen. Find the album you want to add and drag and drop it into your project. Multiple albums can be added at this time.
- Click the Create Project button in the lower right.
Sharing With Users and Groups
Once you have created your project, you’ll want to share it! Depending on how and who you want to share your content, you might want to add users individually or with groups.
Adding Users
You can only add users and groups once you create a project, so make sure to click Create Project first.
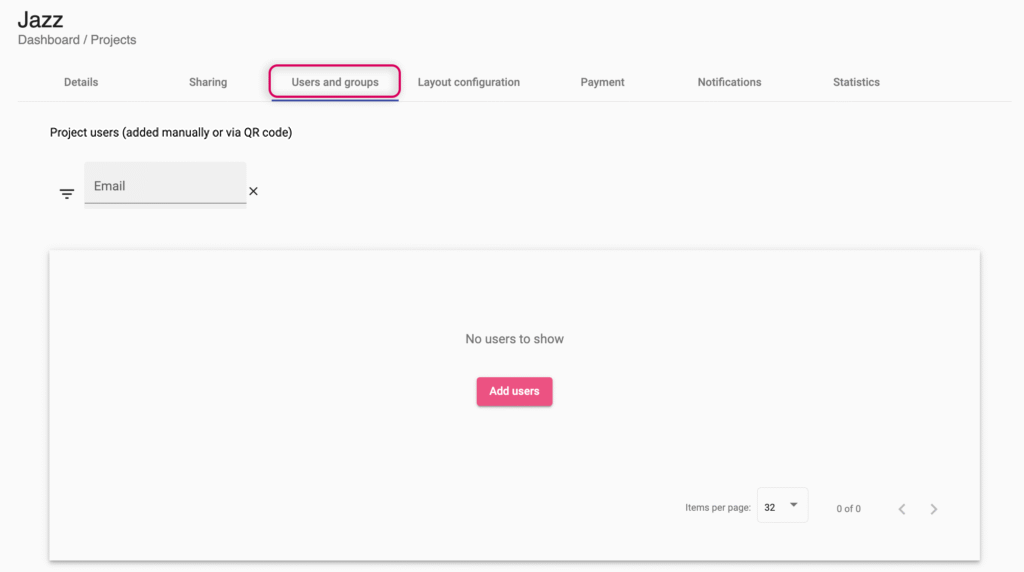
- Click the User and Groups tab.

- Click Add Users.
- Enter in the emails of all the users you would like to invite. Users must be invited to Artist Connection before adding them to content. Learn how to invite users here.
- Once all emails have been added, click Invite.
Adding Groups
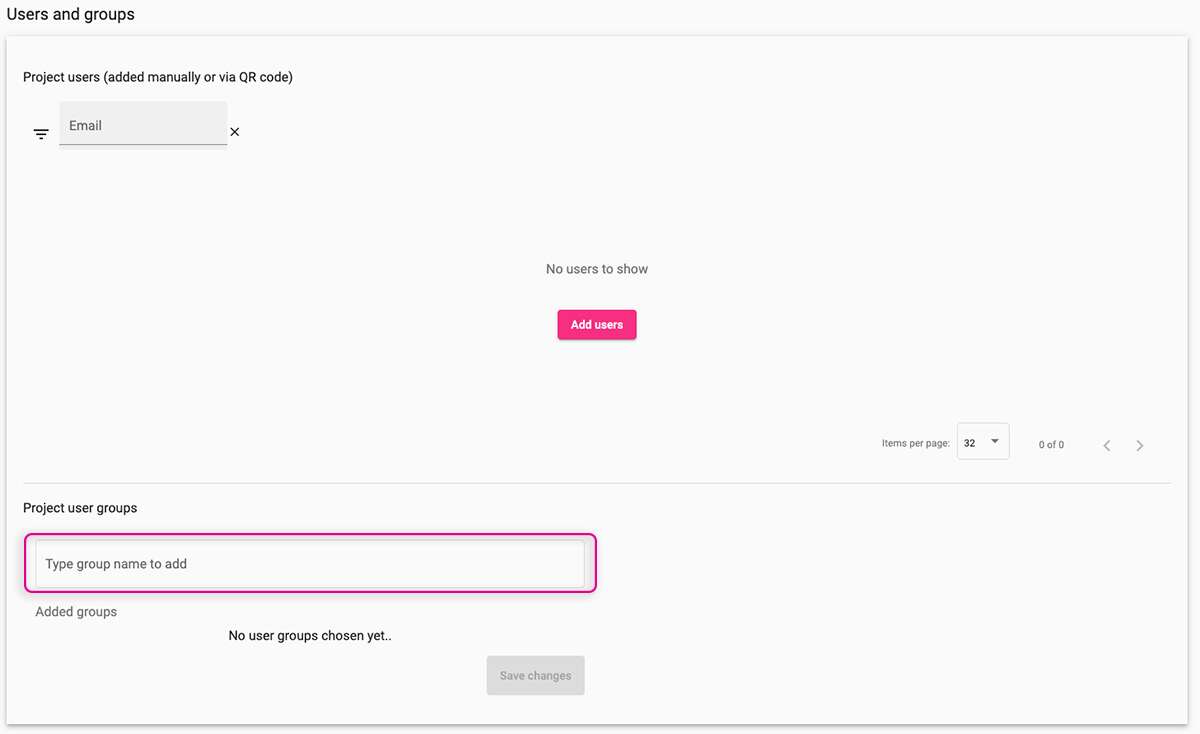
- In the User and Group tab, scroll to the bottom and find the Project User Group section. Type in a group name to add them to the project. This makes the project visible for this group in Artist Connection.

- Click the group you’d like to add to the project
- Click Save Changes.
