How to Create and Connect a Live Stream
Before you can connect a live stream to Artist Connection, you must create one on your studio portal. Learn how to create a live stream here.
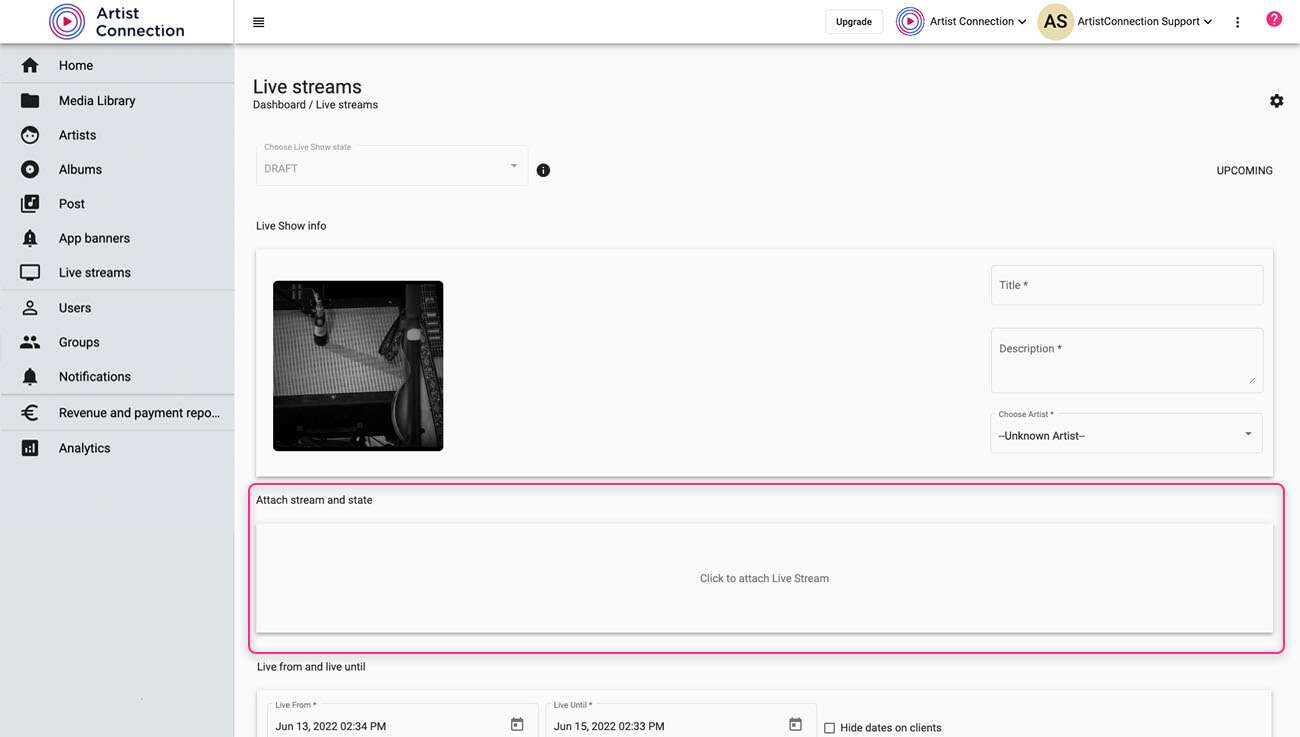
- After creating a live stream, a new section called Attach stream and state will appear. Click it to create and/or connect your live stream.

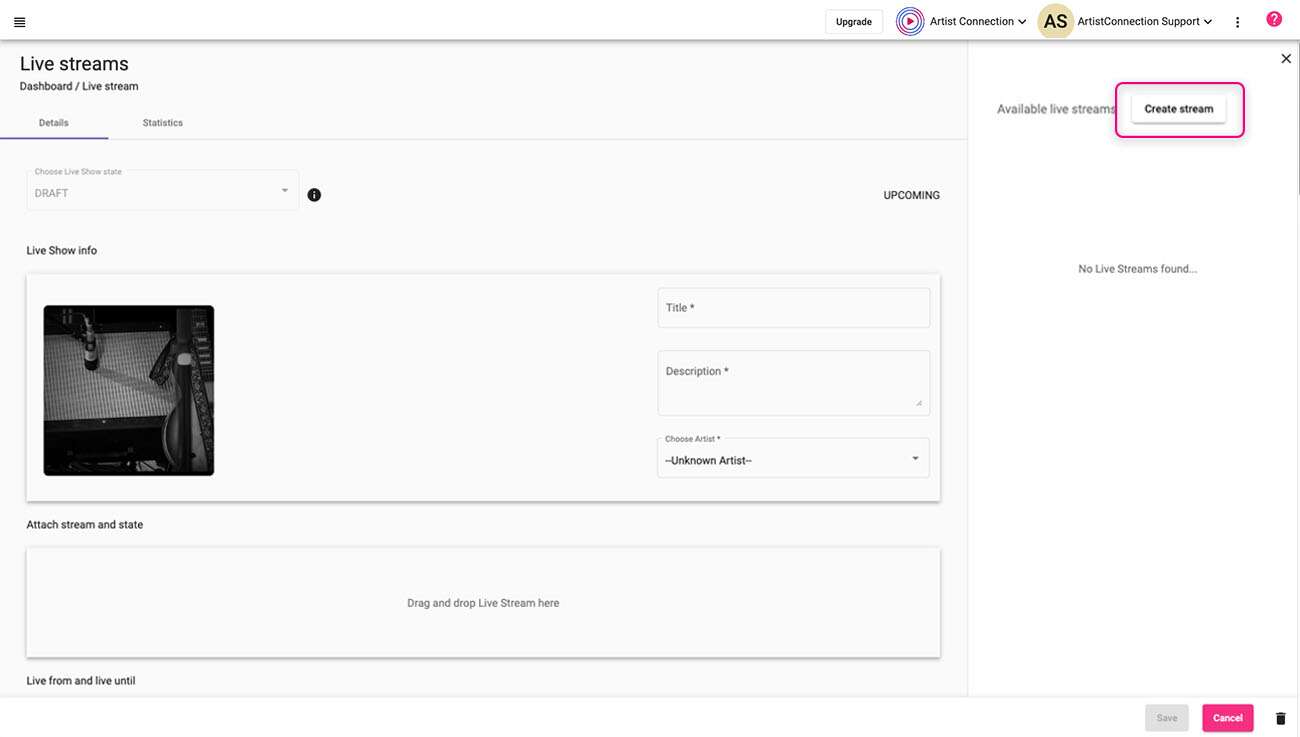
- A panel will open on the right side of the screen. You can select an existing live stream or create one. To create a new live stream, click the Create stream button.

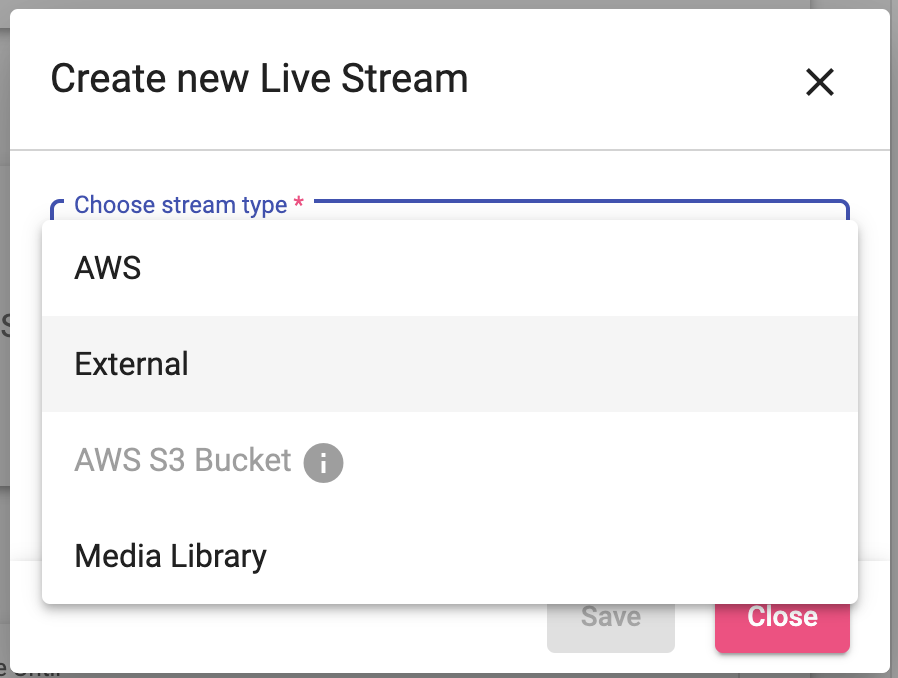
- A dialog box will open, select the streaming method you want to connect to Artist Connection from the drop down menu.

Connecting to AWS
- Enter your stream title.
- Select the input type, Amazon Web Service supports two input types:
- Single: this input is a single URL to connect to Artist Connection. We recommend using this during testing.
- Standard: this input contains two URLs to connect to Artist Connection as a fail safe in case any dropouts occur. Select this type during your live stream.
- Select a region.
- Click Save.
Connecting an External Source
- Enter your stream title.
- Enter in the stream URL from your external streaming source.
- Click Save.
Connecting an AWS S3 Bucket
If you would like to use an external AWS S3 Bucket, please contact support.
Connecting to the Media Library
After you stream has ended, use the Media Library to create an archive of the stream. Once you end your stream, you will be able to download the file. We recommend trimming the video file to reduce its size before reuploading.
- Enter your stream title.
- Locate the file you want to add to your live stream.
- Click Save.
